Web
Installing Client Library for Web
This page contains the steps for installing the Client Library in your web app.
By the end of this installation, you should be able to:
- Display a locale and region selector widget on your site.
- Control how your web app transitions between languages and regions.
- Store your logged-in user preferences (if applicable) and view them in the dashboard.
Feel free to clone our React Sample App to follow along with this guide.
Prerequisite
If you’re new to OneSky, you’ll need to create an account. Then you can sign in and access the Effect Editor from the dashboard.
Step 1 - Configure the Display Interface Texts effect
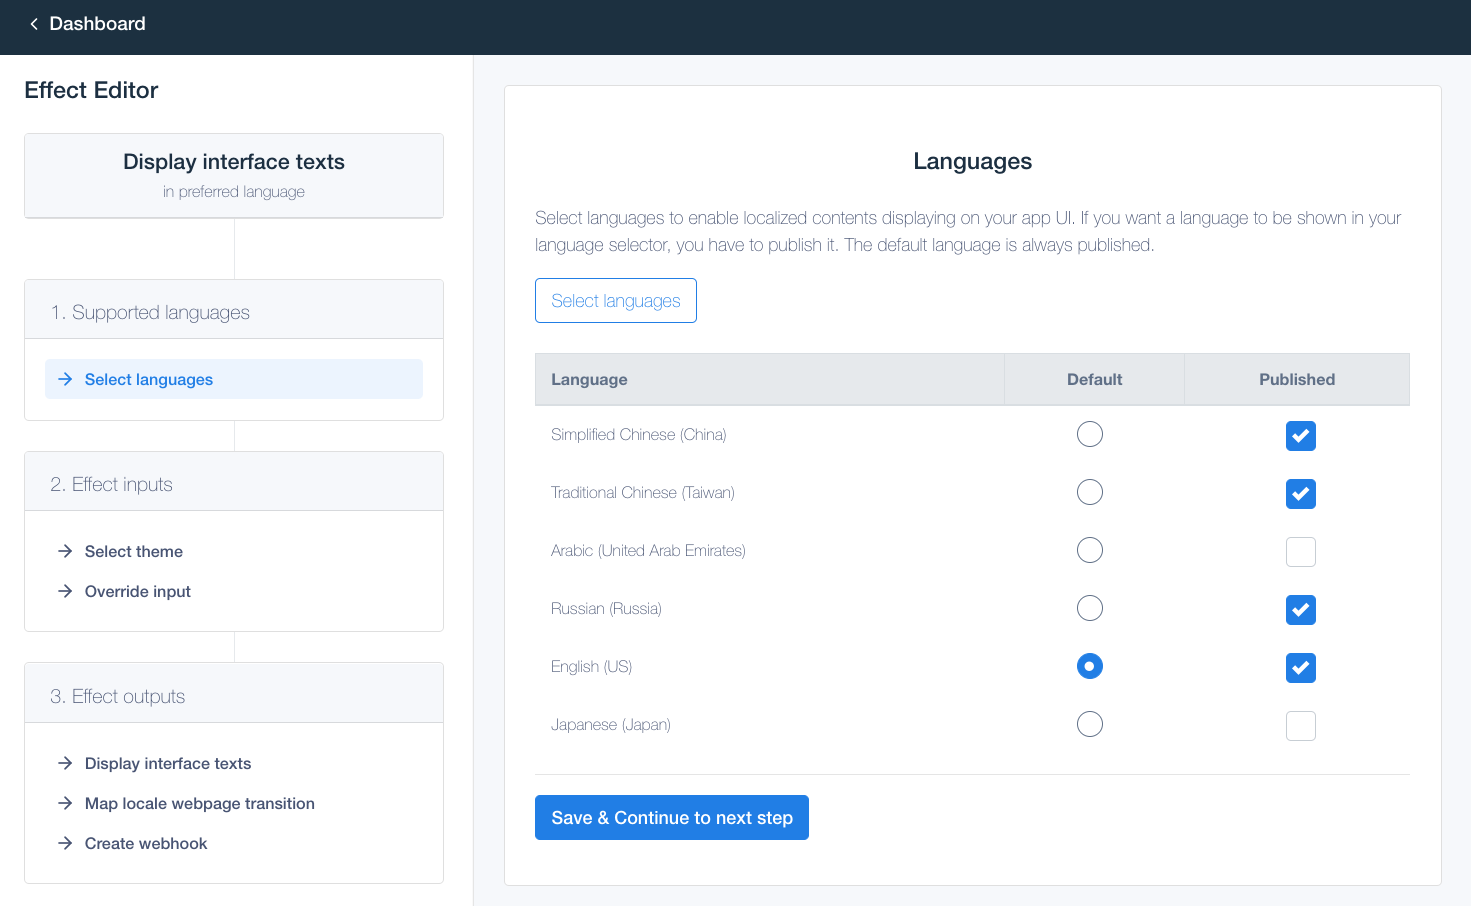
The "Display Interface Texts" effect determines which language gets displayed to your end-users.

In particular, you'll want to configure the following:
-
What languages do you want to make available to the user to select?
Check the "Published" checkbox for languages to display to your end users. -
What is the source language of your site?
Select as the "Default" language. -
How do you want to handle transitions when a user switches language?
Under Map locale webpage transition, type in the text that you want to append to your URL whenever there's a change in user selection for each language. For example:
| When language input as | Then transit webpage to |
|---|---|
| Simplified Chinese (China) | ?lang=zh-Hans-CN |
| Traditional Chinese (Taiwan) | ?lang=zh-Hant-TW |
| Russian (Russia) | ?lang=ru-RU |
| English (US) | ?lang=en-US |
Note, as an alternative to a URL query parameter, you can also configure the above to redirect to a sub / top level domain.
Step 2 - Configure the Direct to Regional Sites effect
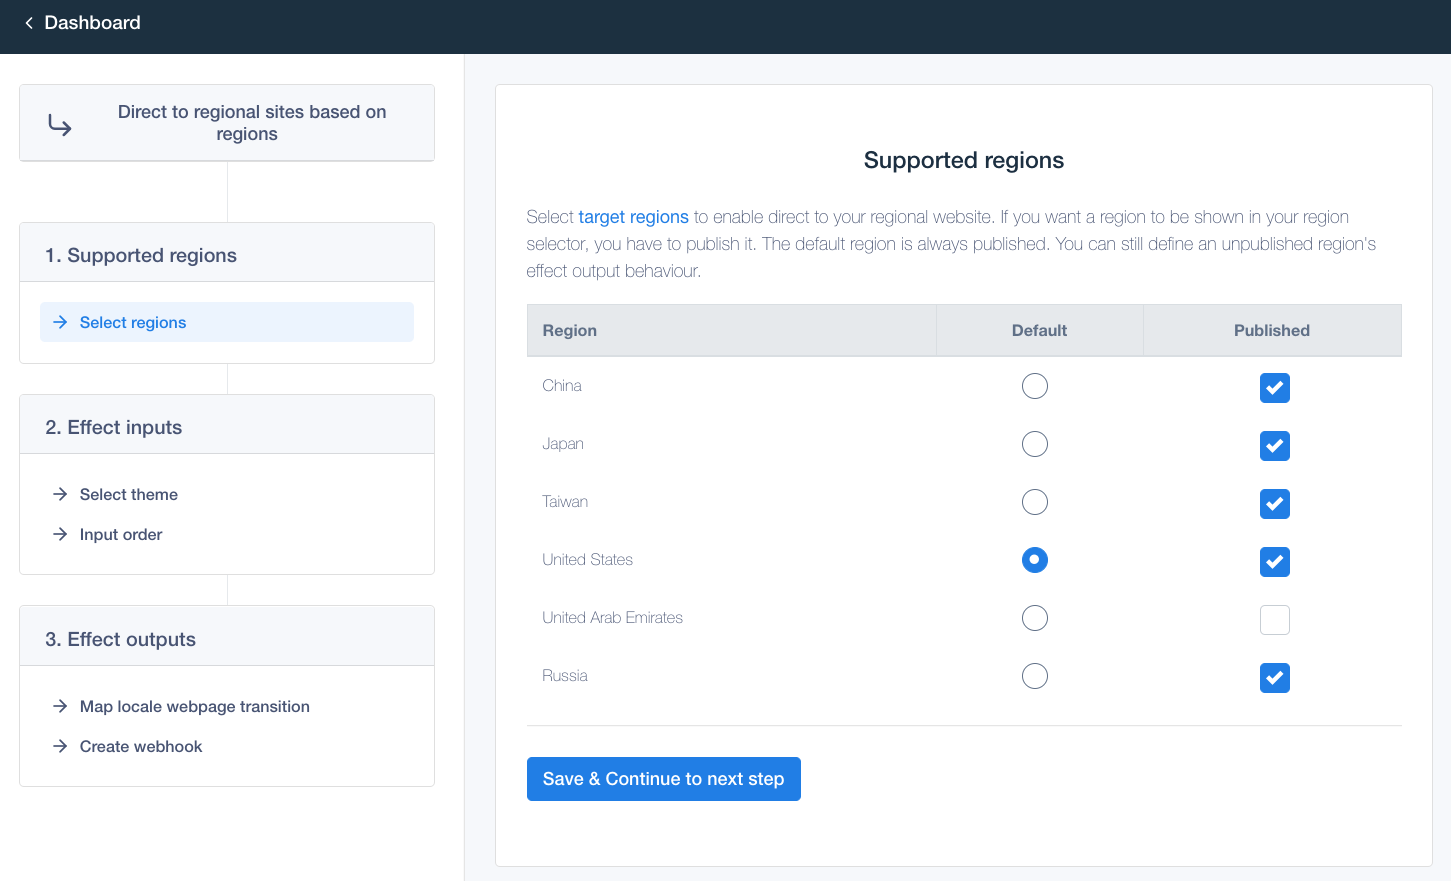
If your app has regional sites, then you can take advantage of OneSky's Region Selector. This effect lets users select their desired region, so that content from that region can be displayed.

Similar to the Display Interface Texts, you'll want to configure the following:
-What regions does your app support?
Check the box for "Published" next to each region. You can also select a default.
-What is the input order for determining a region?
Select where you want to use auto-detection or user input to determine the region.
-How do you want to handle transitions when the user switches regions?
Here you can configure the URL routes for each region. These will be used when the user selects a new region. Here is an example configuration:
| When region input as | Then transit webpage to |
|---|---|
| China | ?region=cn |
| Taiwan | ?region=tw |
| Russia | ?region=rs |
| United States | ?region=us |
You can configure the above as a URL query parameter or redirect to a sub / top level domain.
Step 3 - Obtain Your API Key
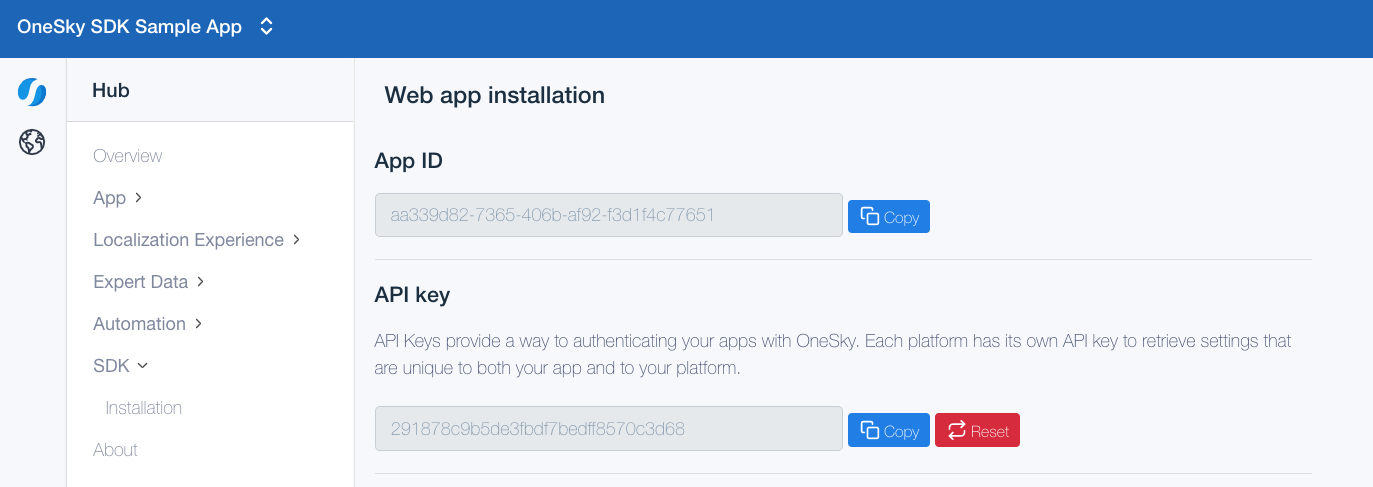
Obtain your API key via SDK > Installation on the dashboard. This key will be used in your web app to authenticate with OneSky's API.

Step 4 - Implement the in-app locale and region selector
The locale and region selector are pre-built UI to use in your app, for users to select their desired region and language. These can be used to implement the effects configured in the previous steps.
To display the locale and region selector in your web app, paste the below HTML snippets in any locations you'd like to render the selectors:
-<language-selector></language-selector> Language selector
-<region-selector></region-selector> Region selector
React Sample App
To see implementation of the Client Library, please check out this React Sample App. It contains the implementation of the language and region selector, as well the necessary javascript shown below.
Next, add the javascript below (also found in the dashboard) in the app's main page (e.g. public/index.html). Copy and paste it before the </body> tag on that page.
<script src="https://cdn.onesky.app/widget/YOUR_APP_ID"></script>
<script type="text/javascript">
    window.onesky = {
        app: {
            id: 'YOUR_APP_ID'
        }
    };
</script>
Logged Out vs Logged In?
Logged out users are anonymous visitors whereas logged in users are registered users in the OneSky sense. For logged in users, you will be access their preferences from other locations.
<script src="https://cdn.onesky.app/widget/YOUR_APP_ID"></script>
<script type="text/javascript">
    window.onesky = {
        app: {
            id: 'YOUR_APP_ID'
        },
        user: {
            id: '123456',
            name: 'John Doe',
            email: '[email protected]'
        }
    };
</script>
Step 5 - Launch App
Now you can launch your app with the client library installed. Use the region and locale selector to test preference selection and verify the effects are synchronized with OneSky.
To further automate your app's localization experience, please see the CLI Cheat Sheet. This contains a quick start guide on importing localized resource files into your app.
Updated almost 2 years ago